


Have you ever wondered how applications like WhatsApp manage to delete your status updates after 24 hours automatically? Or how some websites keep their log files and cached data pruned to avoid disk space issues? The answer lies in a powerful feature called Time to Live (TTL), which is supported by MongoDB, one of the most popular NoSQL databases.
TTL in MongoDB is a mechanism that allows you to automatically remove documents from a collection after a specified period of time. This feature can be incredibly useful in scenarios where you need to manage data with a limited lifespan, such as log files, session data, cached information, or even user-generated content like status updates.
What is TTL?
TTL stands for Time to Live, and it is a special index type in MongoDB that allows you to automatically remove documents from a collection after a specified period of time. The TTL index is created on a date or ISODate field, and MongoDB automatically deletes documents when the indexed field value is older than the specified TTL value.
Use of TTL Index
TTL indexes are particularly useful in scenarios where you need to manage data with a limited lifespan, such as:
Logging and auditing: Log files or audit trails often have a limited retention period, after which the data becomes irrelevant and can be removed.
Session management: Session data in web applications typically has a limited lifespan, and TTL indexes can help manage and remove expired sessions automatically.
Caching: Cached data often has a limited validity period, and TTL indexes can help ensure that stale cached data is automatically removed.
Temporary data storage: In some cases, you may need to store temporary data that has a defined expiration time, such as user-generated content like status updates or temporary files.
How to use TTL correctly?
We are planning to implement a TTL Index in our MongoDB database schema using Mongoose to create Whatsapp user statuses that automatically vanish after 24 hours. While this isn't intended for real production use, we'll approach the problem from first principles to solve it.
- Setup the Basic Node.js App
npm init -y
npm install express mongoose @aws-sdk/client-s3 dotenv multer multer-s3
- Create the MongoDB schema with TTL index
//service/service.js (Read the S3 Blog if it seems alien to you)
const { S3Client } = require("@aws-sdk/client-s3");

const AWS = new S3Client({
  region: process.env.AWS_REGION,
  credentials: {
    accessKeyId: process.env.AWS_ACCESS_KEY,
    secretAccessKey: process.env.AWS_SECRET_KEY,
  },
});


module.exports = {
  AWS
};
//middlewares/upload (Read the S3 Blog if it seems alien to you)
const multer = require('multer');
const multerS3 = require("multer-s3");
const { AWS } = require('../service/service');
require('dotenv').config();
const upload = multer({
  storage: multerS3({
    s3: AWS,
    bucket: process.env.BUCKET,
    key: function (req, file, cb) {
      cb(null, `upload/status/${file.originalname}`);
    },
  }),

});

module.exports = {upload};
//service/service.js (Read the S3 Blog if it seems alien to you)
const mongoose = require('mongoose');
require('dotenv').config();

const userStatusSchema = new mongoose.Schema({
  userId: { type: String, required: true },
  statusContent: { type: String, required: true }, // S3 object URL
  createdAt: { type: Date, required: true, expires: 86400, default: Date.now } // 24 hours in seconds
});

userStatusSchema.index({ createdAt: 1 }, { expireAfterSeconds: 86400 }); // 24 hours TTL index


const UserStatus = mongoose.model('UserStatus', userStatusSchema);

module.exports = UserStatus;
- Configure the S3 Bucket
So If you are following our previous blog regarding AWS and S3 service then you might know how to configure the S3 bucket and get the credentials like access-key,secret-key, bucket name, region to move further in the topic.
- Connect to your DB and write the route for upload
const express = require('express');
const mongoose = require('mongoose');
const UserStatus = require('./db/db');
const {upload}=require('./middlewares/upload');

require('dotenv').config();
const app = express();


// Connect to MongoDB
mongoose.connect(process.env.MONGO_URL)
  .then(() => console.log('MongoDB connected'))
  .catch(err => console.error('MongoDB connection error:', err));

// Upload status route
app.post('/upload-status', upload.single('status'), async (req, res) => {
  try {
    const userId = req.body.userId; // You can get from the token in authorization headers or give it random manually
    const statusContent = req.file.key; //Your Image or the Video Status

    const newStatus = new UserStatus({ userId, statusContent });
    await newStatus.save();

    res.status(200).json({ message: 'Status uploaded successfully' });
  } catch (err) {
    console.error(err);
    res.status(500).json({ message: 'Error uploading status' });
  }
});

app.listen(process.env.PORT, () => console.log('Server started on port 3000'));
- Test the end Points correctly
A simple suggestion is to try the endpoint with a small expireAfterSeconds TTL index in the schema. So let's try it with Postman


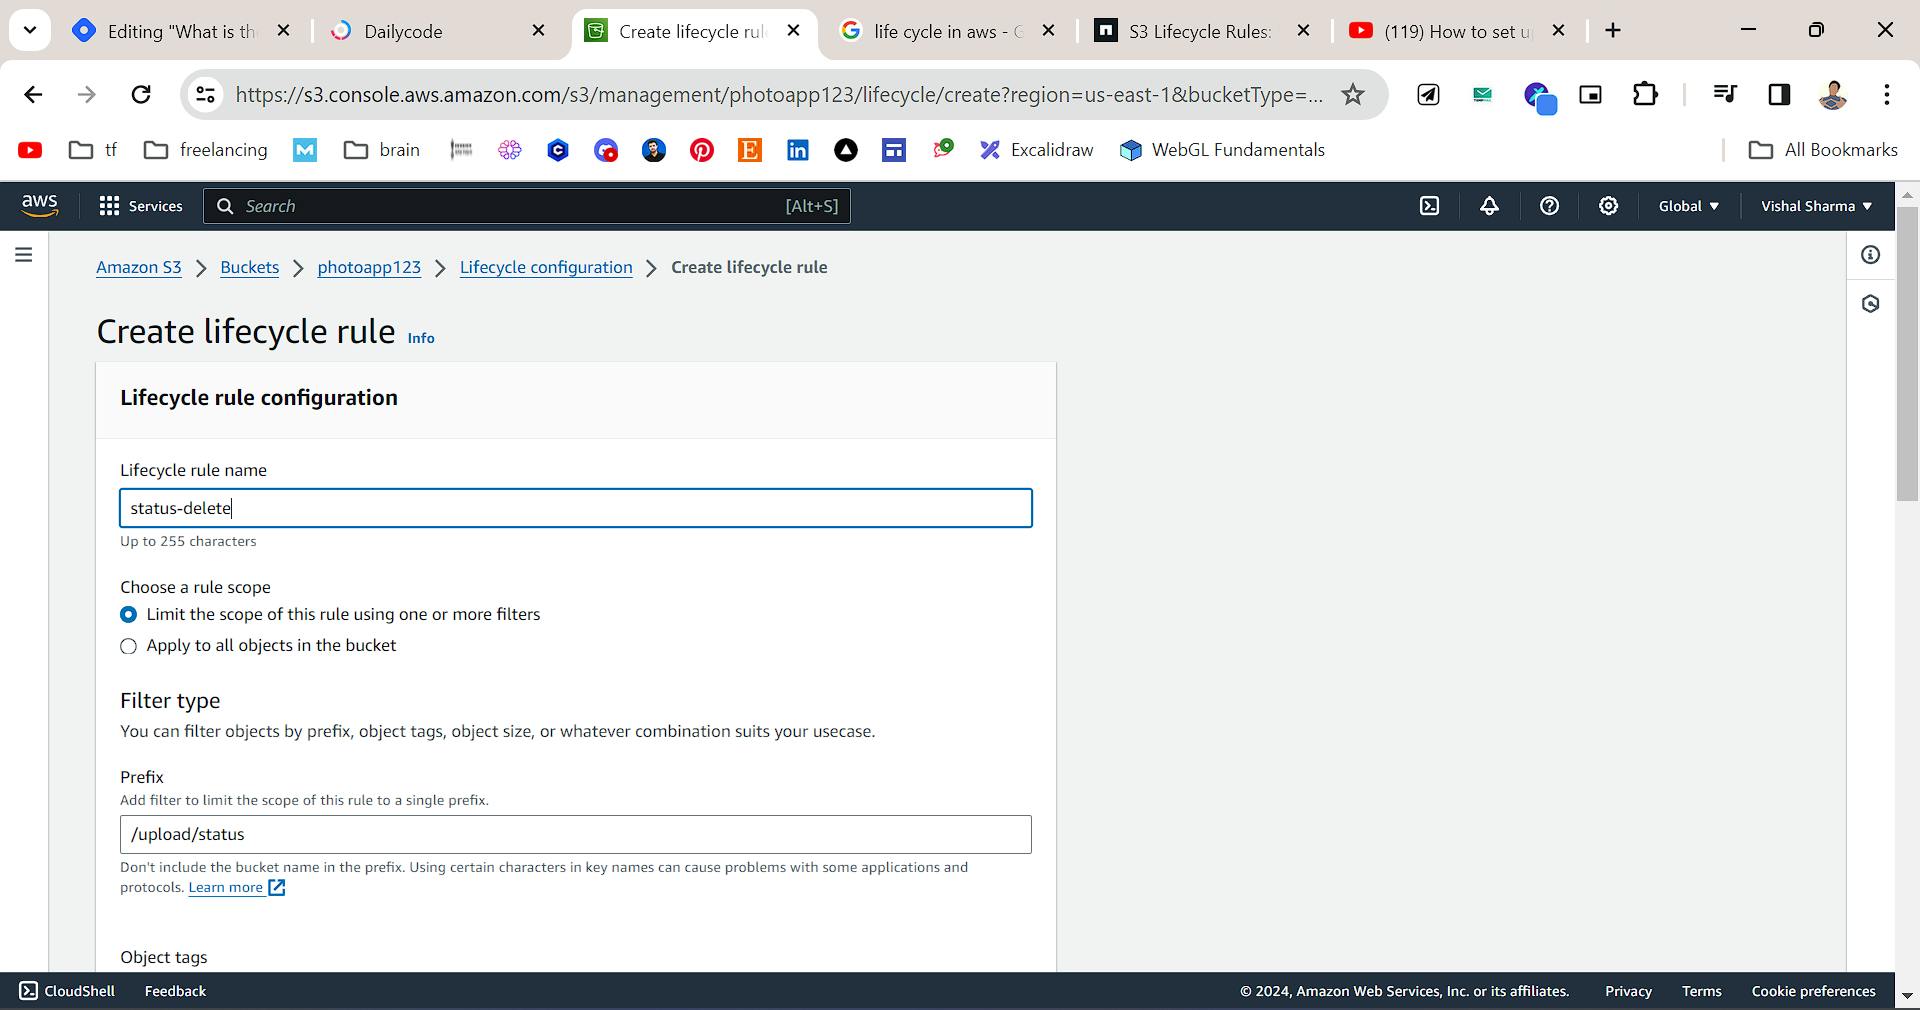
Above we have made the lifecycle rule which we will discuss later on in the AWS blogs.
Hope you have a clear understanding of the TTL index, what is its benefits and when we can use this index in our project.
Disclaimer: We cannot simulataneously delete the S3 Object using TTL so what we can do is , we can add lifecycle in s3 to delete the object after every 24 hours time .That we will see in some other blog.
If you love my content then please share this with your friends and tag me on X also if you have any problem with the code then you can see the code from the GitHub repo.
So keep learning and keep Coding 👨💻👨💻