

Table of contents
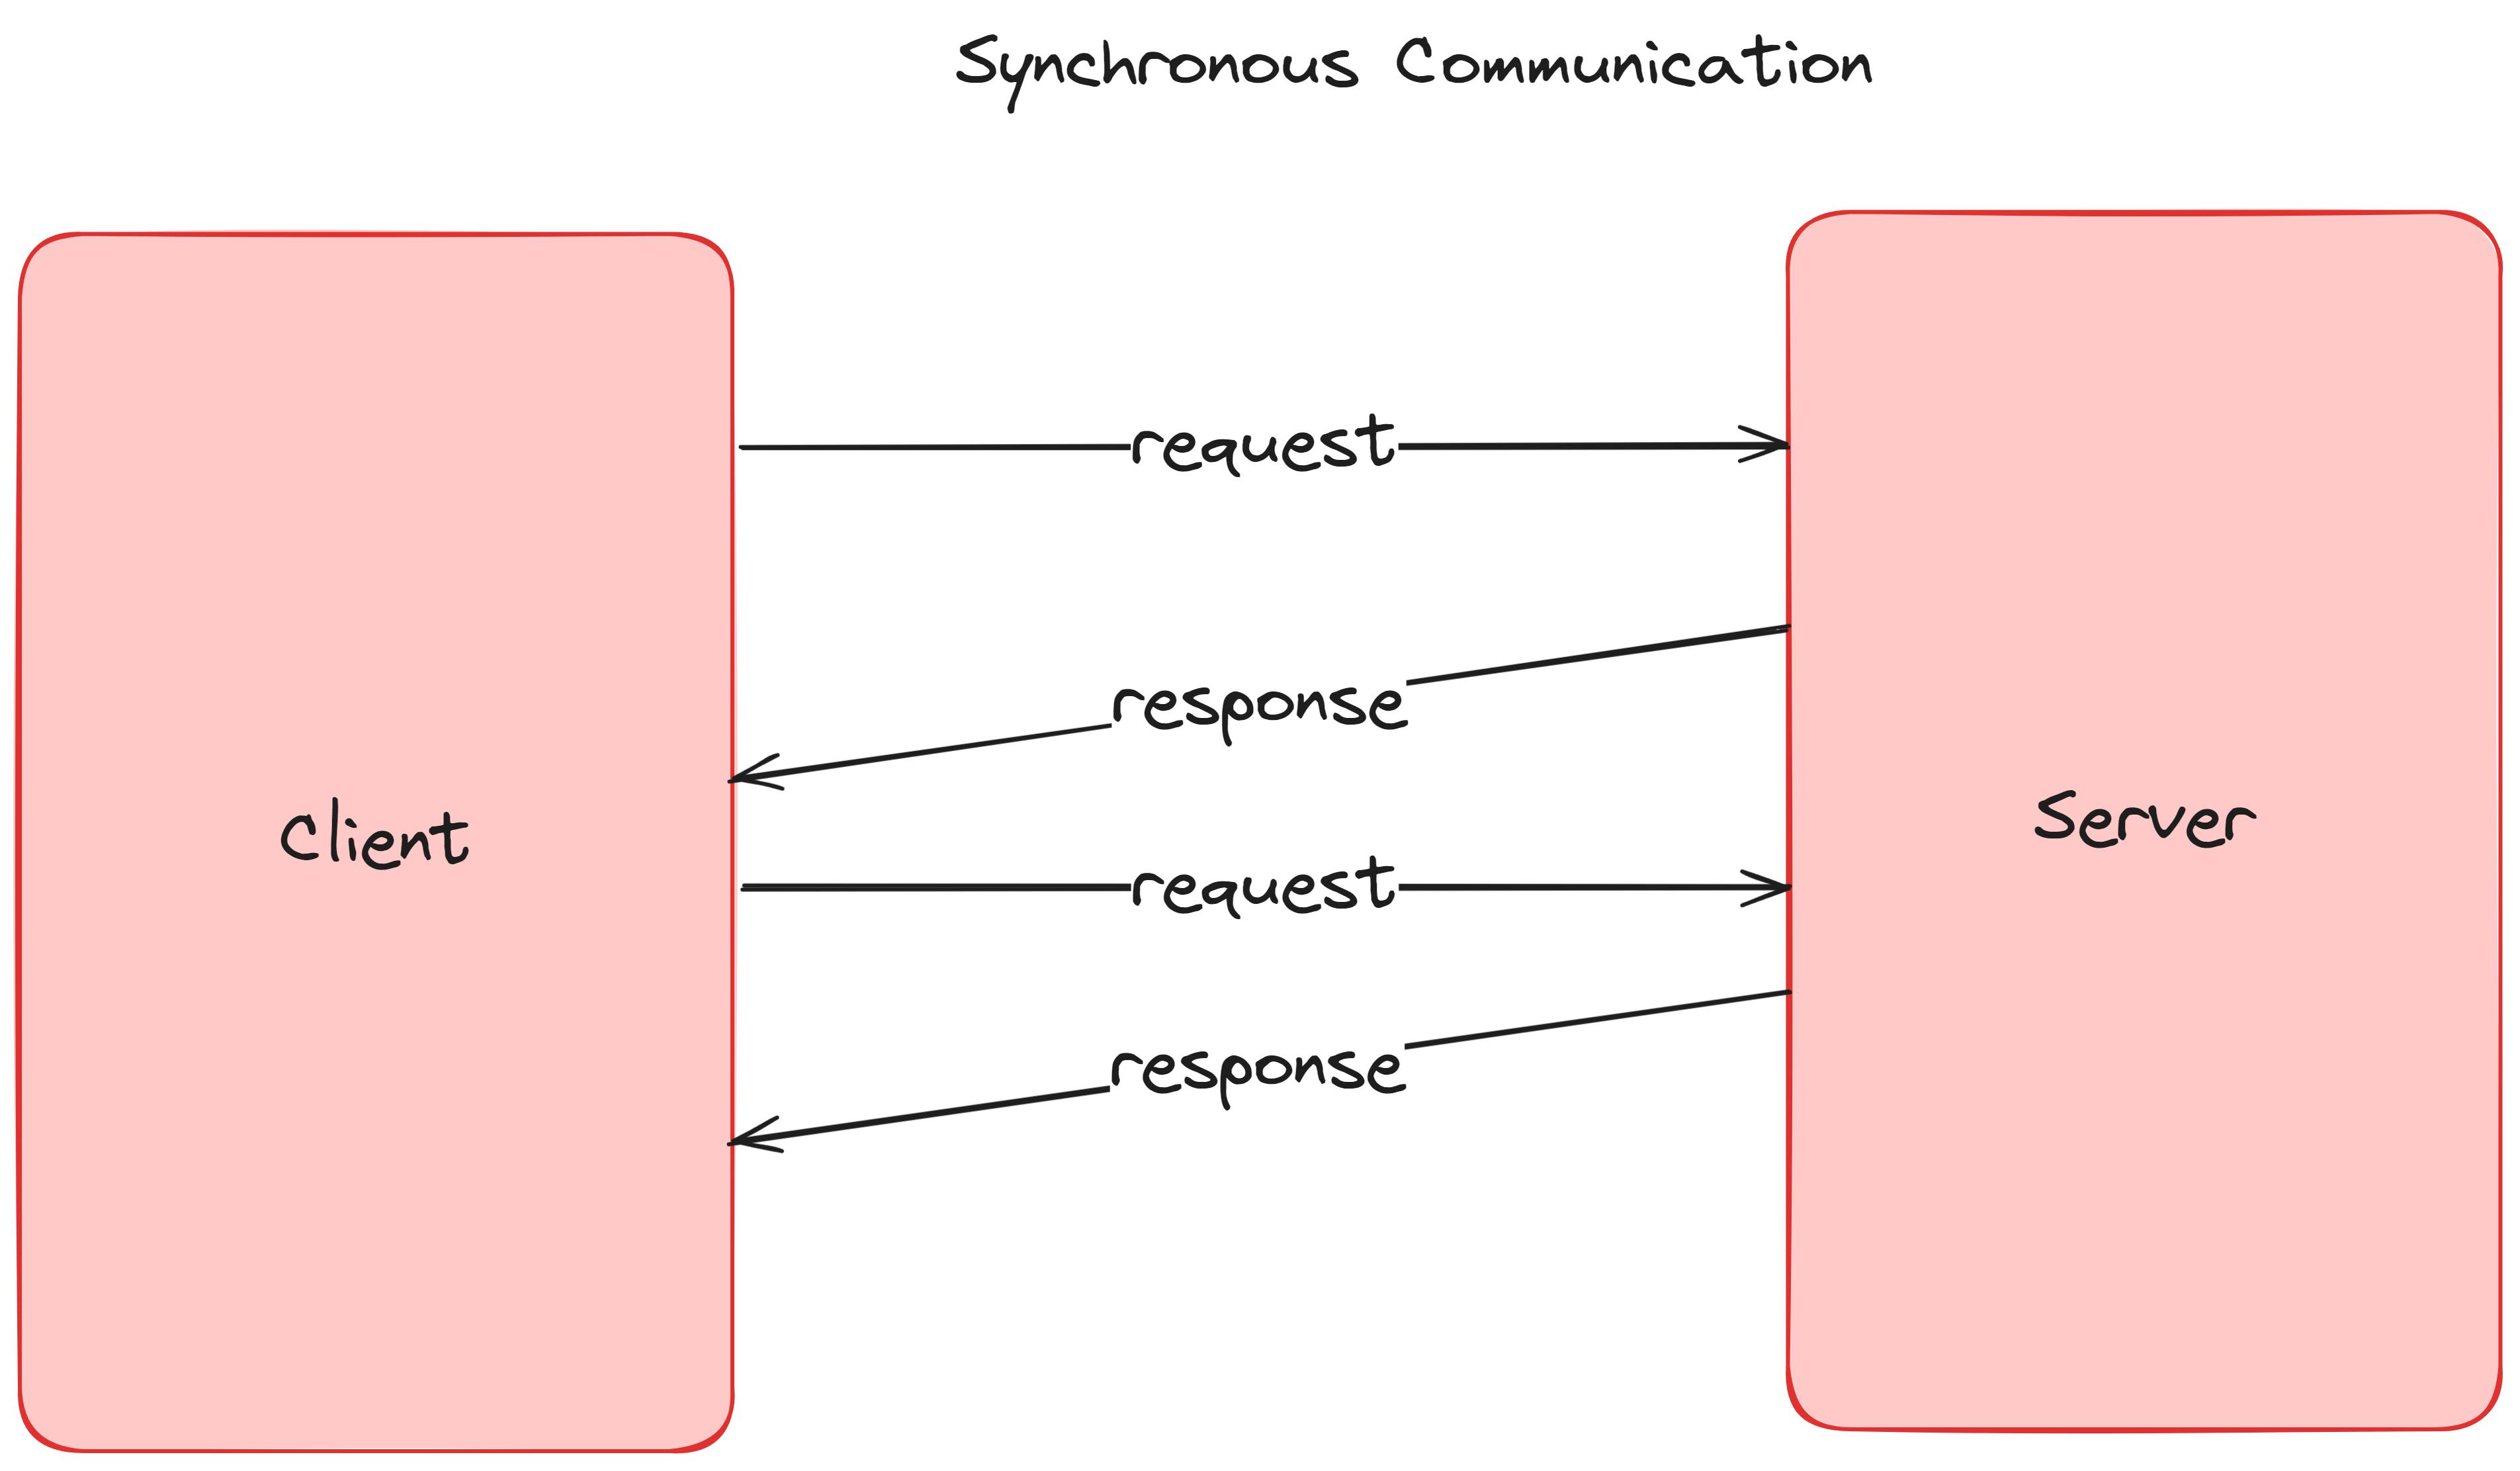
As developers, we have worked with APIs to enable communication between two systems. However, until now, we have primarily worked with synchronous systems, where two entities communicate when endpoints are triggered from the user side to the backend side. In contrast, in asynchronous systems, communication occurs when a particular event happens within the system, such as instantly notifying the user after their bank account gets credited or debited.
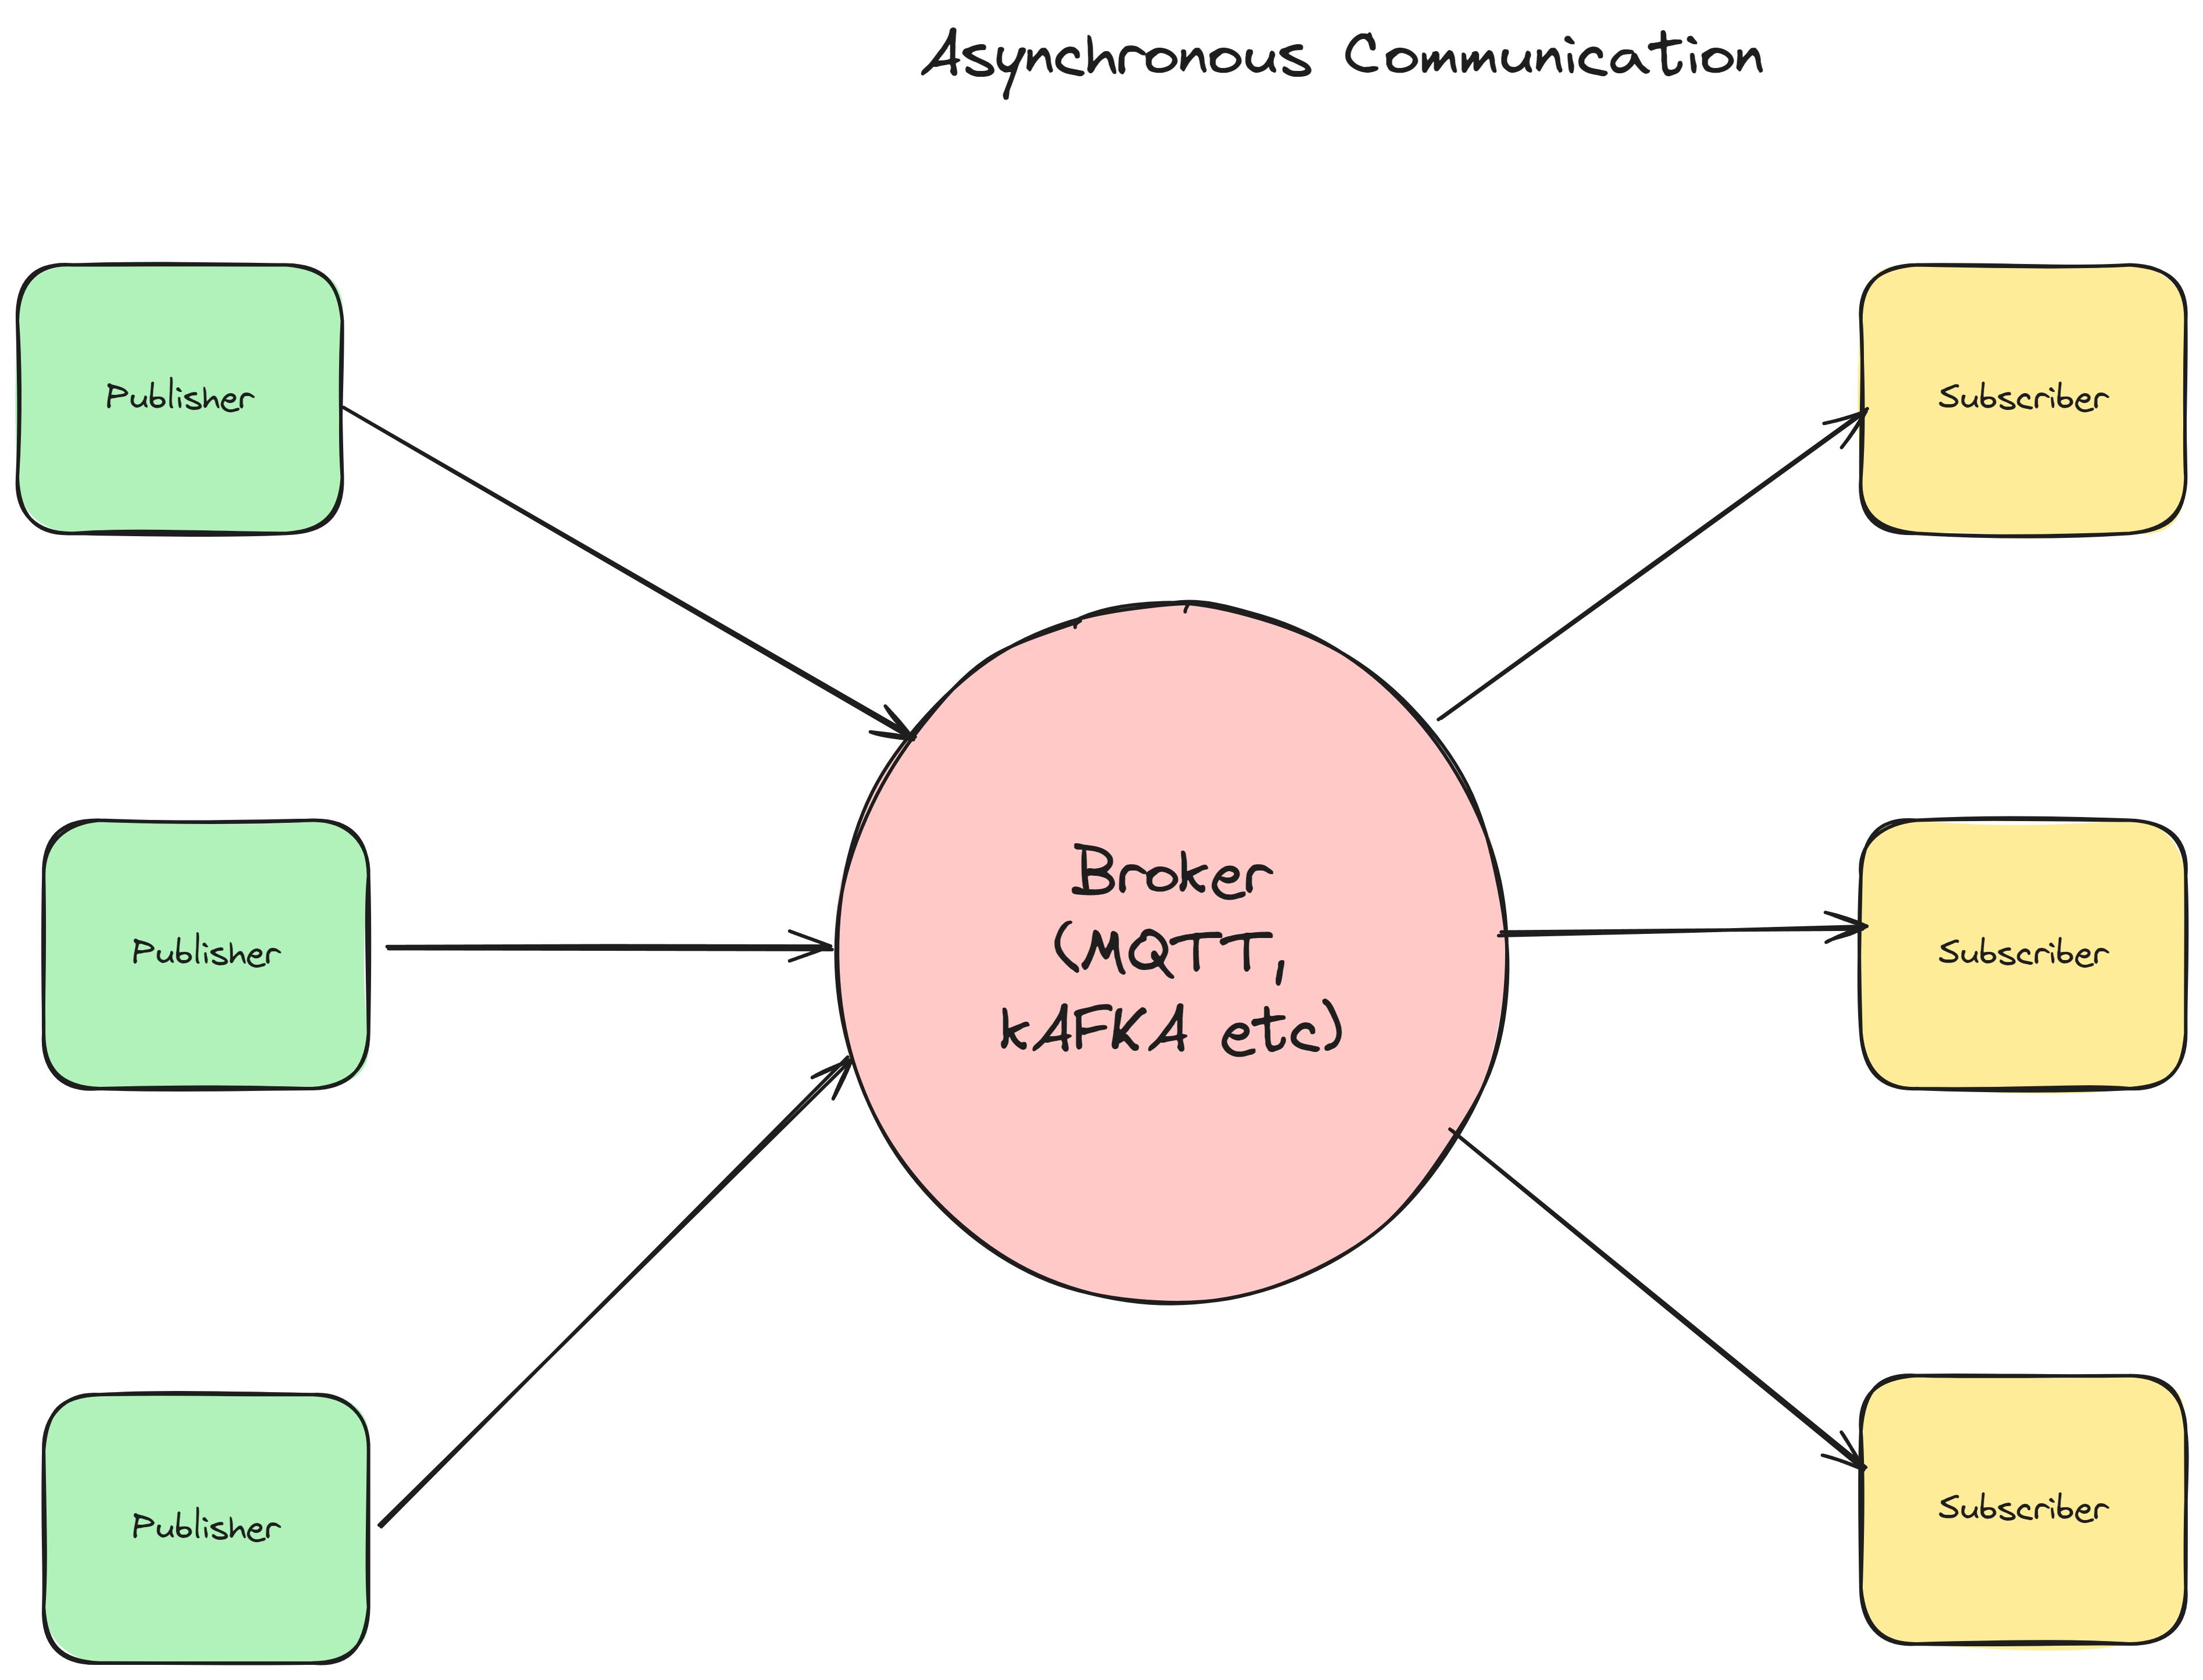
In asynchronous systems, communication is driven by events rather than direct requests. For instance, when a bank account is credited or debited, an event is triggered, and the system publishes a notification to inform interested parties, like the user, about the account activity. This event-driven communication allows for real-time updates and decouples the sender from the receiver, enabling more efficient and scalable systems.
What is AsyncAPI?
AsyncAPI is an open-source specification that aims to define and describe asynchronous APIs in a machine-readable format. It is designed to handle event-driven architectures, message queues, streaming platforms, and other asynchronous communication patterns.
AsyncAPI is based on the OpenAPI Specification, which is widely used for defining and documenting traditional request-response APIs. However, while OpenAPI focuses on synchronous communication, AsyncAPI addresses the needs of asynchronous, event-driven APIs.
Some key benefits of using AsyncAPI include:
Standardization: AsyncAPI provides a consistent and structured way to describe asynchronous APIs, promoting better understanding and adoption across teams and organizations.
Documentation: AsyncAPI specifications can be used to generate interactive documentation, making it easier for developers to understand and consume the asynchronous API.
Code Generation: Several tools can generate code stubs, client libraries, or server implementations directly from the AsyncAPI specification, accelerating development and reducing errors.
Tooling Support: Various tools and libraries are available for parsing, validating, and working with AsyncAPI specifications, enhancing the development workflow.
Vendor-neutral: AsyncAPI is protocol-agnostic, allowing it to be used with different messaging protocols and technologies, promoting interoperability and flexibility.
How to use AsyncAPI with Node.js?
To use AsyncAPI in your Node.js application and initialize asynchronous communication, you need to follow these steps:
Define your AsyncAPI specification: Start by creating an AsyncAPI specification file (typically in YAML or JSON format) that describes your asynchronous API. This file should define the protocol, channels, messages, operations, and other components of your API.
Install required libraries: Install the
@asyncapi/parserlibrary to parse and validate your AsyncAPI specification, and any protocol-specific libraries you might need (e.g.,mqttfor MQTT,kafka-nodefor Apache Kafka).Parse and validate the specification: Use the
@asyncapi/parserlibrary to parse and validate your AsyncAPI specification, ensuring that it adheres to the AsyncAPI format and catching any errors or inconsistencies.Initialize asynchronous communication: Based on the protocol specified in your AsyncAPI specification, initialize the asynchronous communication channel. This might involve setting up a message broker (e.g., MQTT broker, Kafka cluster), establishing connections, and configuring any necessary authentication or authorization mechanisms.
Implement publishers and subscribers: Develop the components that will act as publishers (producers) and subscribers (consumers) in your asynchronous communication system. Publishers will generate and send messages to the appropriate channels, while subscribers will receive and process messages from those channels.
Integrate with the AsyncAPI specification: Use the information defined in your AsyncAPI specification to configure your publishers and subscribers. This includes details such as channel names, message formats, and operation definitions.
Before directly jump to asyncapi we have to first initialize the empty node app and then install @asyncapi/parser and mqtt as broker.
npm install @asyncapi/parser mqtt
First, let's create a asyncapi.yaml file which will contain specification regarding our asynchronous API.
asyncapi: 3.0.0
info:
  title: Stock Price Update API
  version: 1.0.0
servers:
  mqtt:
    host: broker.emqx.io

    protocol: mqtt
channels:
  stock-prices:
    address: stock-prices
    messages:
      publishStockPrices.message:
        $ref: '#/components/messages/stockPrice'
operations:
  publishStockPrices:
    action: receive
    channel:
      $ref: '#/channels/stock-prices'
    summary: Stock price updates channel
    messages:
      - $ref: '#/channels/stock-prices/messages/publishStockPrices.message'
components:
  messages:
    stockPrice:
      name: stockPrice
      title: Stock Price
      payload:
        $ref: '#/components/schemas/stockPrice'
  schemas:
    stockPrice:
      type: object
      properties:
        symbol:
          type: string
        price:
          type: number
        timestamp:
          type: string
          format: date-time
Make a index.js file and write the code to import the mqtt and make the basic publisher-subscriber code.
//index.js
const mqtt = require('mqtt');
const { Parser, fromFile } = require('@asyncapi/parser');
const parser = new Parser();

async function main() {
  try {

    const asyncapi = await fromFile(parser, './asyncapi.yaml').parse();

    const mqttUrl = `mqtt://${asyncapi.document._json.servers.mqtt.host}:1883`;
    console.log(mqttUrl);
    const clientId = `mqtt_${Math.random().toString(16).slice(3)}`
    const client = mqtt.connect(mqttUrl,{clientId,
     username:"broker",
     password:"public"

    });

    const publishStockPrices = () => {
      const stockPrices = [
        { symbol: 'AAPL', price: 123.45, timestamp: new Date().toISOString() },
        { symbol: 'GOOG', price: 2345.67, timestamp: new Date().toISOString() },
        { symbol: 'MSFT', price: 245.89, timestamp: new Date().toISOString() }
      ];

      const topic = asyncapi.document._json.channels['stock-prices'].address;

      stockPrices.forEach(price => {
        client.publish(topic, JSON.stringify(price));
        console.log(`Published stock price for ${price.symbol}: $${price.price}`);
      });
    };


    const handleStockPrices = (topic, message) => {
      const messageString = message.toString('utf8');
      try {
        const stockPrice = JSON.parse(messageString);
        console.log(`Received stock price for ${stockPrice.symbol}: $${stockPrice.price} (${stockPrice.timestamp})`);
      } catch (error) {
        console.error('Error parsing JSON:', error);
      }
    };

    client.on('connect', () => {
      console.log('MQTT client connected');
      client.subscribe("stock-prices", (err) => {
        if (err) {
          console.error('Error subscribing to stock prices channel:', err);
          return;
        }
        console.log('Subscribed to stock prices channel');
        setInterval(publishStockPrices, 5000); // Publish stock prices every 5 seconds
      });
    });

    // Handle incoming messages
    client.on('message', handleStockPrices);

    // Handle errors
    client.on('error', (error) => {
      console.error('MQTT client error:', error);
    });

  } catch (error) {
    console.error('Error parsing AsyncAPI specification:', error);
  }
}

main();
This code is a Node.js application that uses the MQTT protocol to publish and subscribe to stock price updates. It also utilizes the AsyncAPI specification to obtain the MQTT broker's configuration details.
Here's a breakdown of the code:
- Importing Required Modules
const mqtt = require('mqtt');
const { Parser, fromFile } = require('@asyncapi/parser');
The code imports the mqtt module, which provides an MQTT client implementation, and the Parser and fromFile functions from the @asyncapi/parser module, which is used to parse the AsyncAPI specification.
- Parsing the AsyncAPI Specification
const parser = new Parser();

async function main() {
  try {
    const asyncapi = await fromFile(parser, './asyncapi.yaml').parse();
    // ...
  } catch (error) {
    console.error('Error parsing AsyncAPI specification:', error);
  }
}
The code creates a new instance of the Parser class and defines an async main function. Inside the main function, it uses the fromFile function to parse the AsyncAPI specification file (asyncapi.yaml) and retrieve the configuration details.
- Connecting to the MQTT Broker
 const mqttUrl = `mqtt://${asyncapi.document._json.servers.mqtt.host}:1883`;
console.log(mqttUrl);
const clientId = `mqtt_${Math.random().toString(16).slice(3)}`;
const client = mqtt.connect(mqttUrl, {
  clientId,
  username: "broker",
  password: "public"
});
The code constructs the MQTT broker URL based on the host information from the AsyncAPI specification. It then generates a unique client ID and connects to the MQTT broker using the mqtt.connect function, providing the URL, client ID, username, and password.
- Publishing Stock Prices
const publishStockPrices = () => {
  const stockPrices = [
    { symbol: 'AAPL', price: 123.45, timestamp: new Date().toISOString() },
    { symbol: 'GOOG', price: 2345.67, timestamp: new Date().toISOString() },
    { symbol: 'MSFT', price: 245.89, timestamp: new Date().toISOString() }
  ];

  const topic = asyncapi.document._json.channels['stock-prices'].address;

  stockPrices.forEach(price => {
    client.publish(topic, JSON.stringify(price));
    console.log(`Published stock price for ${price.symbol}: $${price.price}`);
  });
};
The publishStockPrices function defines an array of stock prices with symbols, prices, and timestamps. It then retrieves the MQTT topic from the AsyncAPI specification (stock-prices channel). For each stock price in the array, the function publishes the price as a JSON string to the specified topic using the client.publish method and logs a message indicating the published stock price.
- Handling Incoming Stock Prices
const handleStockPrices = (topic, message) => {
  const messageString = message.toString('utf8');
  try {
    const stockPrice = JSON.parse(messageString);
    console.log(`Received stock price for ${stockPrice.symbol}: $${stockPrice.price} (${stockPrice.timestamp})`);
  } catch (error) {
    console.error('Error parsing JSON:', error);
  }
};
The handleStockPrices function is a callback that handles incoming MQTT messages. It converts the received message (a Buffer) to a UTF-8 string and attempts to parse it as JSON. If the parsing is successful, it logs the received stock price details. If an error occurs during parsing, it logs the error message.
- Subscribing to Stock Price Updates
client.on('connect', () => {
  console.log('MQTT client connected');
  client.subscribe("stock-prices", (err) => {
    if (err) {
      console.error('Error subscribing to stock prices channel:', err);
      return;
    }
    console.log('Subscribed to stock prices channel');
    setInterval(publishStockPrices, 5000); // Publish stock prices every 5 seconds
  });
});
The code listens for the connect event on the MQTT client. When the client connects successfully, it subscribes to the stock-prices topic using the client.subscribe method. If the subscription is successful, it logs a message and sets an interval to call the publishStockPrices function every 5 seconds, effectively publishing new stock prices periodically.
- Handling Incoming Messages and Errors
client.on('message', handleStockPrices);
client.on('error', (error) => {
  console.error('MQTT client error:', error);
});
The code sets up event listeners for incoming MQTT messages and errors. When a message is received, it calls the handleStockPrices function with the topic and message payload. If an error occurs, it logs the error message.
If you found this blog helpful, I encourage you to share it with your fellow developers and anyone interested in learning more about asynchronous communication and API design. Additionally, please leave a ❤️ to show your appreciation, as it motivates me to produce more high-quality content like this in the future.
Remember, the world of asynchronous APIs is constantly evolving, and there's always more to learn and explore. Stay curious, keep experimenting, and don't hesitate to reach out if you have any questions or feedback.
Happy coding! 👨💻👨💻